Filling out the MT

Ben
Last Update 2 years ago
When you click on “Complete the form” on the row of the client you need to create an MT form from “Customers” on your home screen, you’ll see options for both the monthly and quarterly MT.
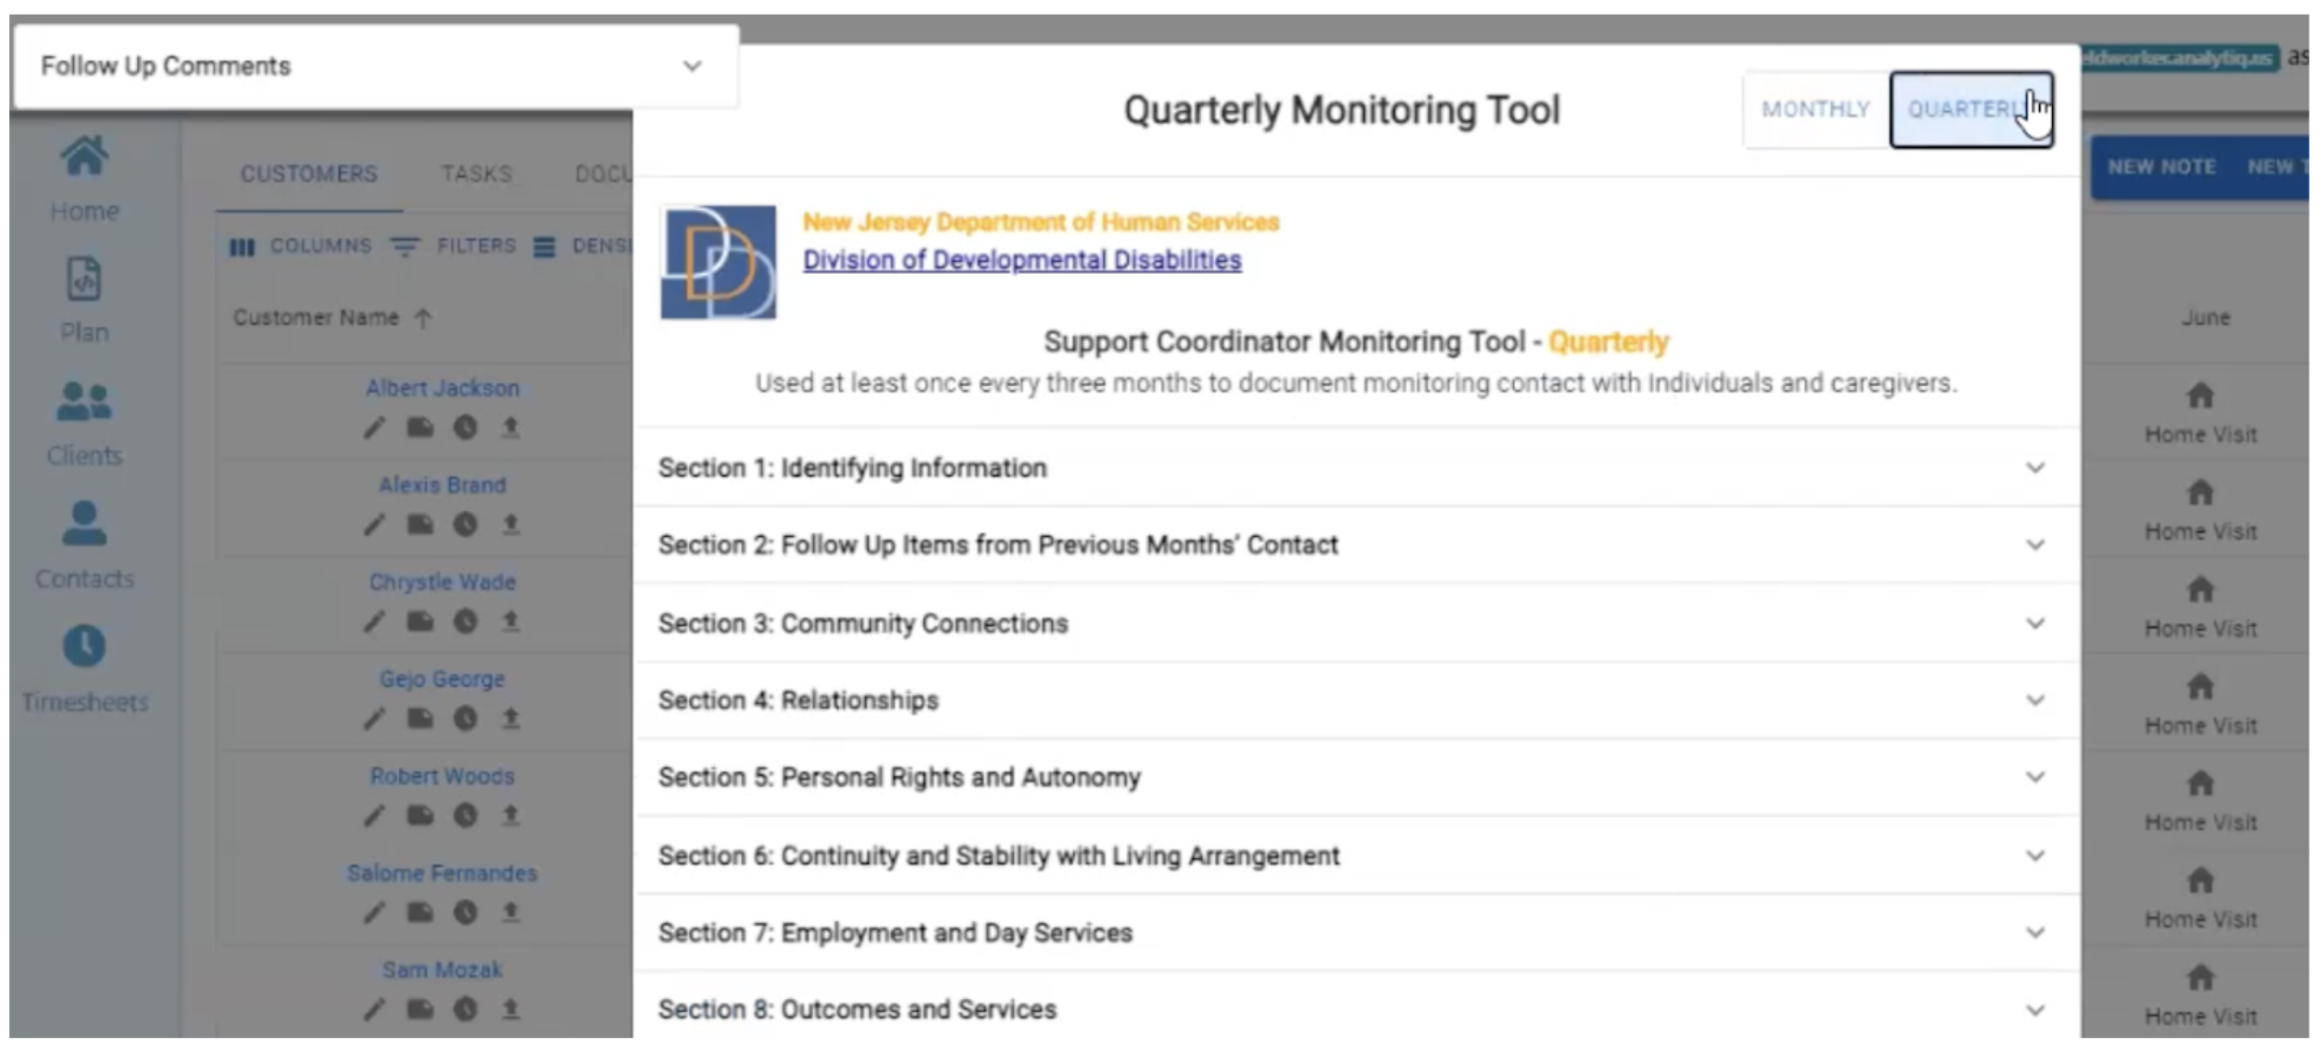
To the left, you’ll be able to see any follow-up comments from the previous MTs, which is useful as a reference for creating the current MT. You can open and close this view.
For the MT itself, sections in blue have already been completed, and sections in black are still missing information. You will not be able to submit an MT unless every section has been completed, so you won’t accidentally submit an MT with missing information.
For section 1, most of the client’s information will be pre-filled from the data present in iRecords from the DDD sync.
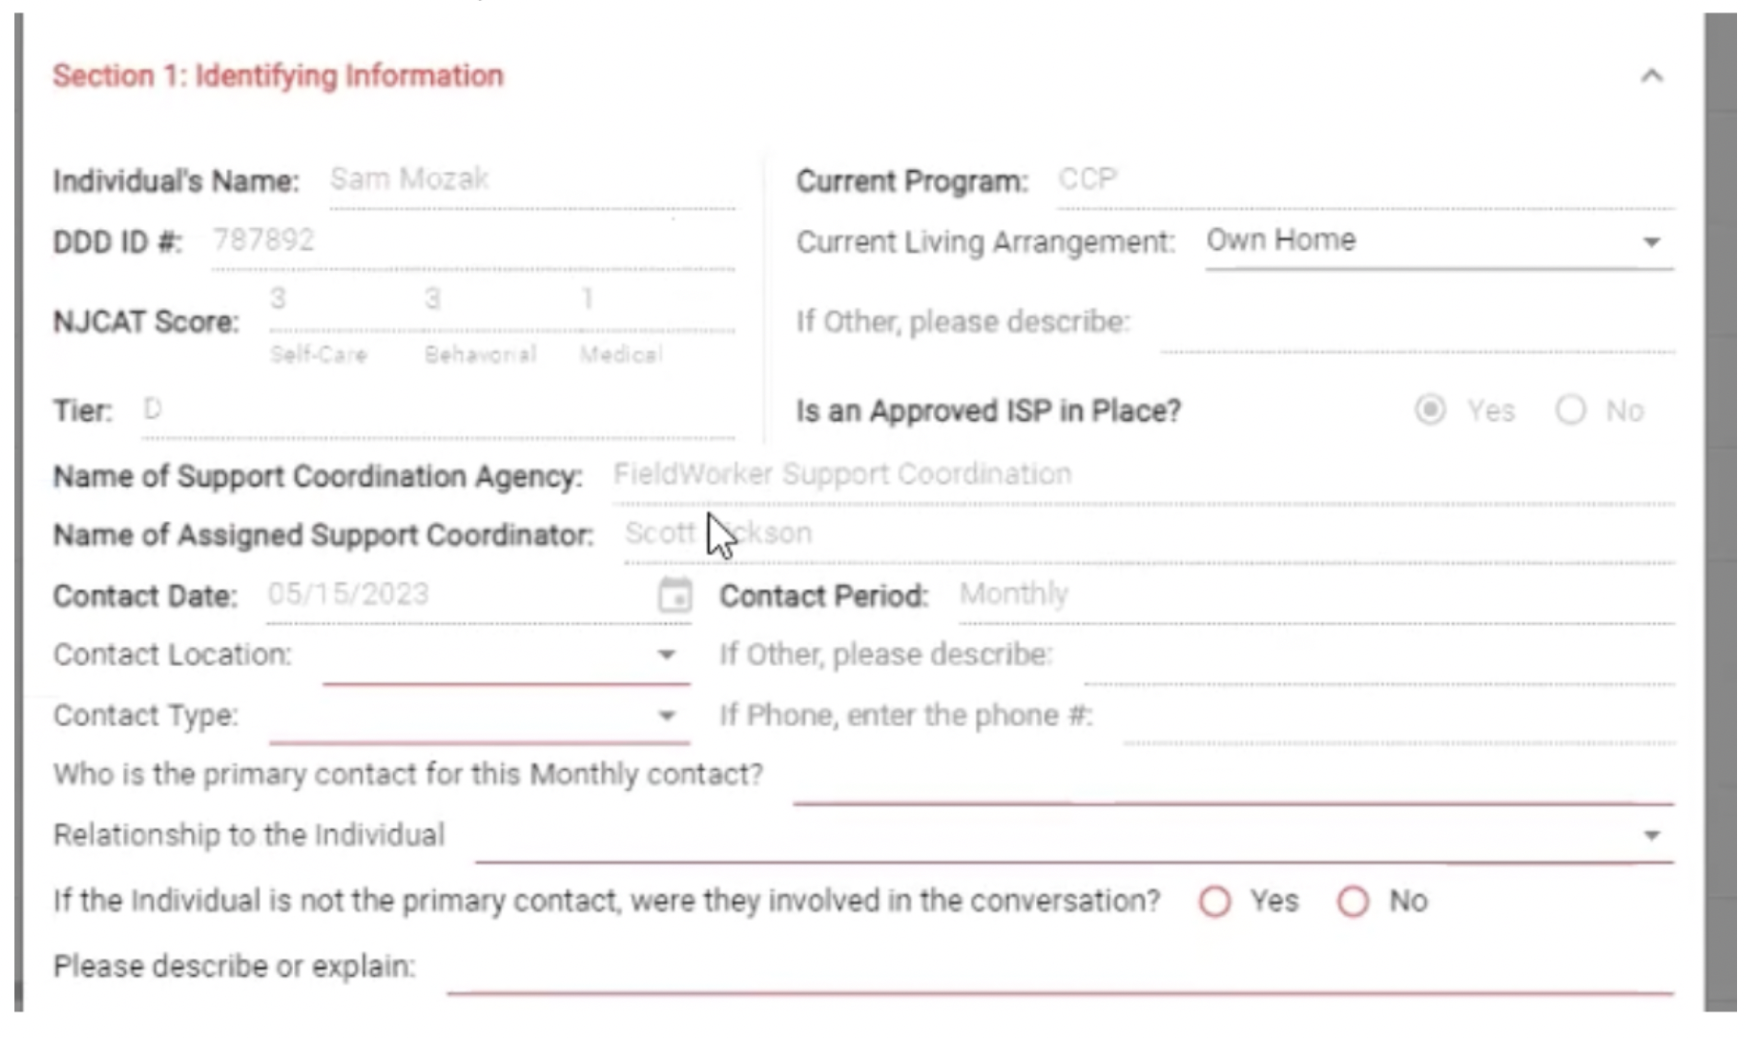
For some questions, you’ll have drop downs. You’ll need to select one option from the drop down to fill out the response for these pieces of information.

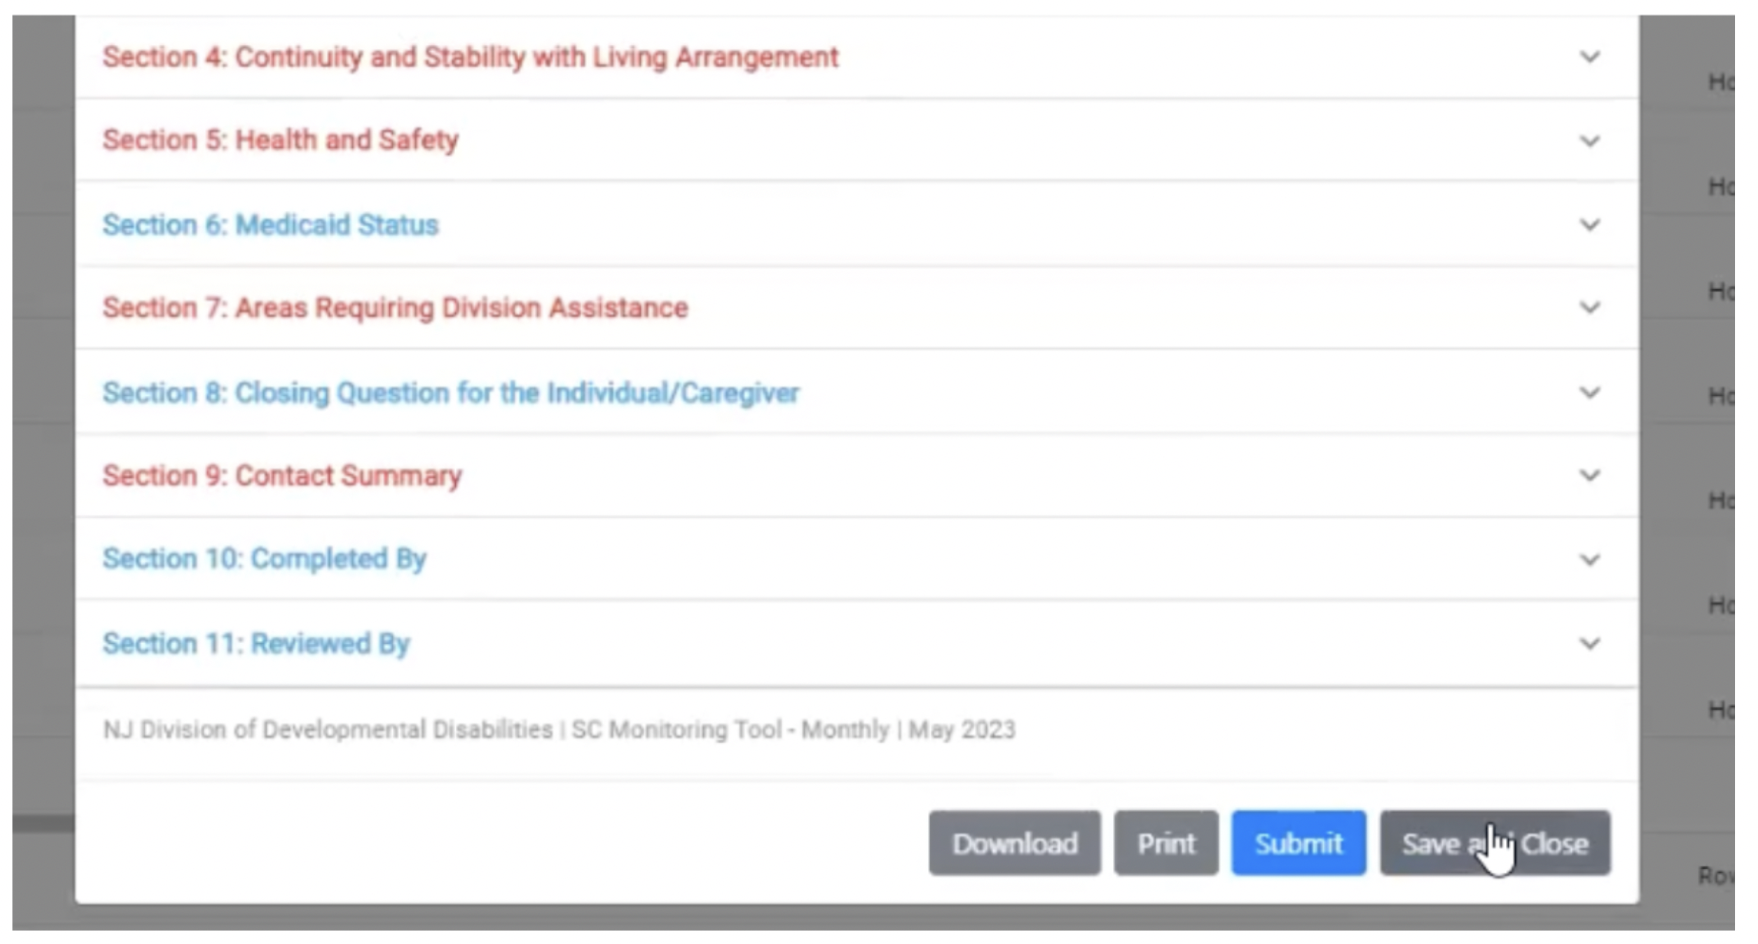
As you can see here, missing sections are highlighted in red, indicating that the support coordinator tried to submit but this information was missing and is required for submission.
Once a section has been completed, it will turn blue.
If you need to complete an MT at a later time, you can click on “Save and Close” to come back and continue the form without losing your progress.
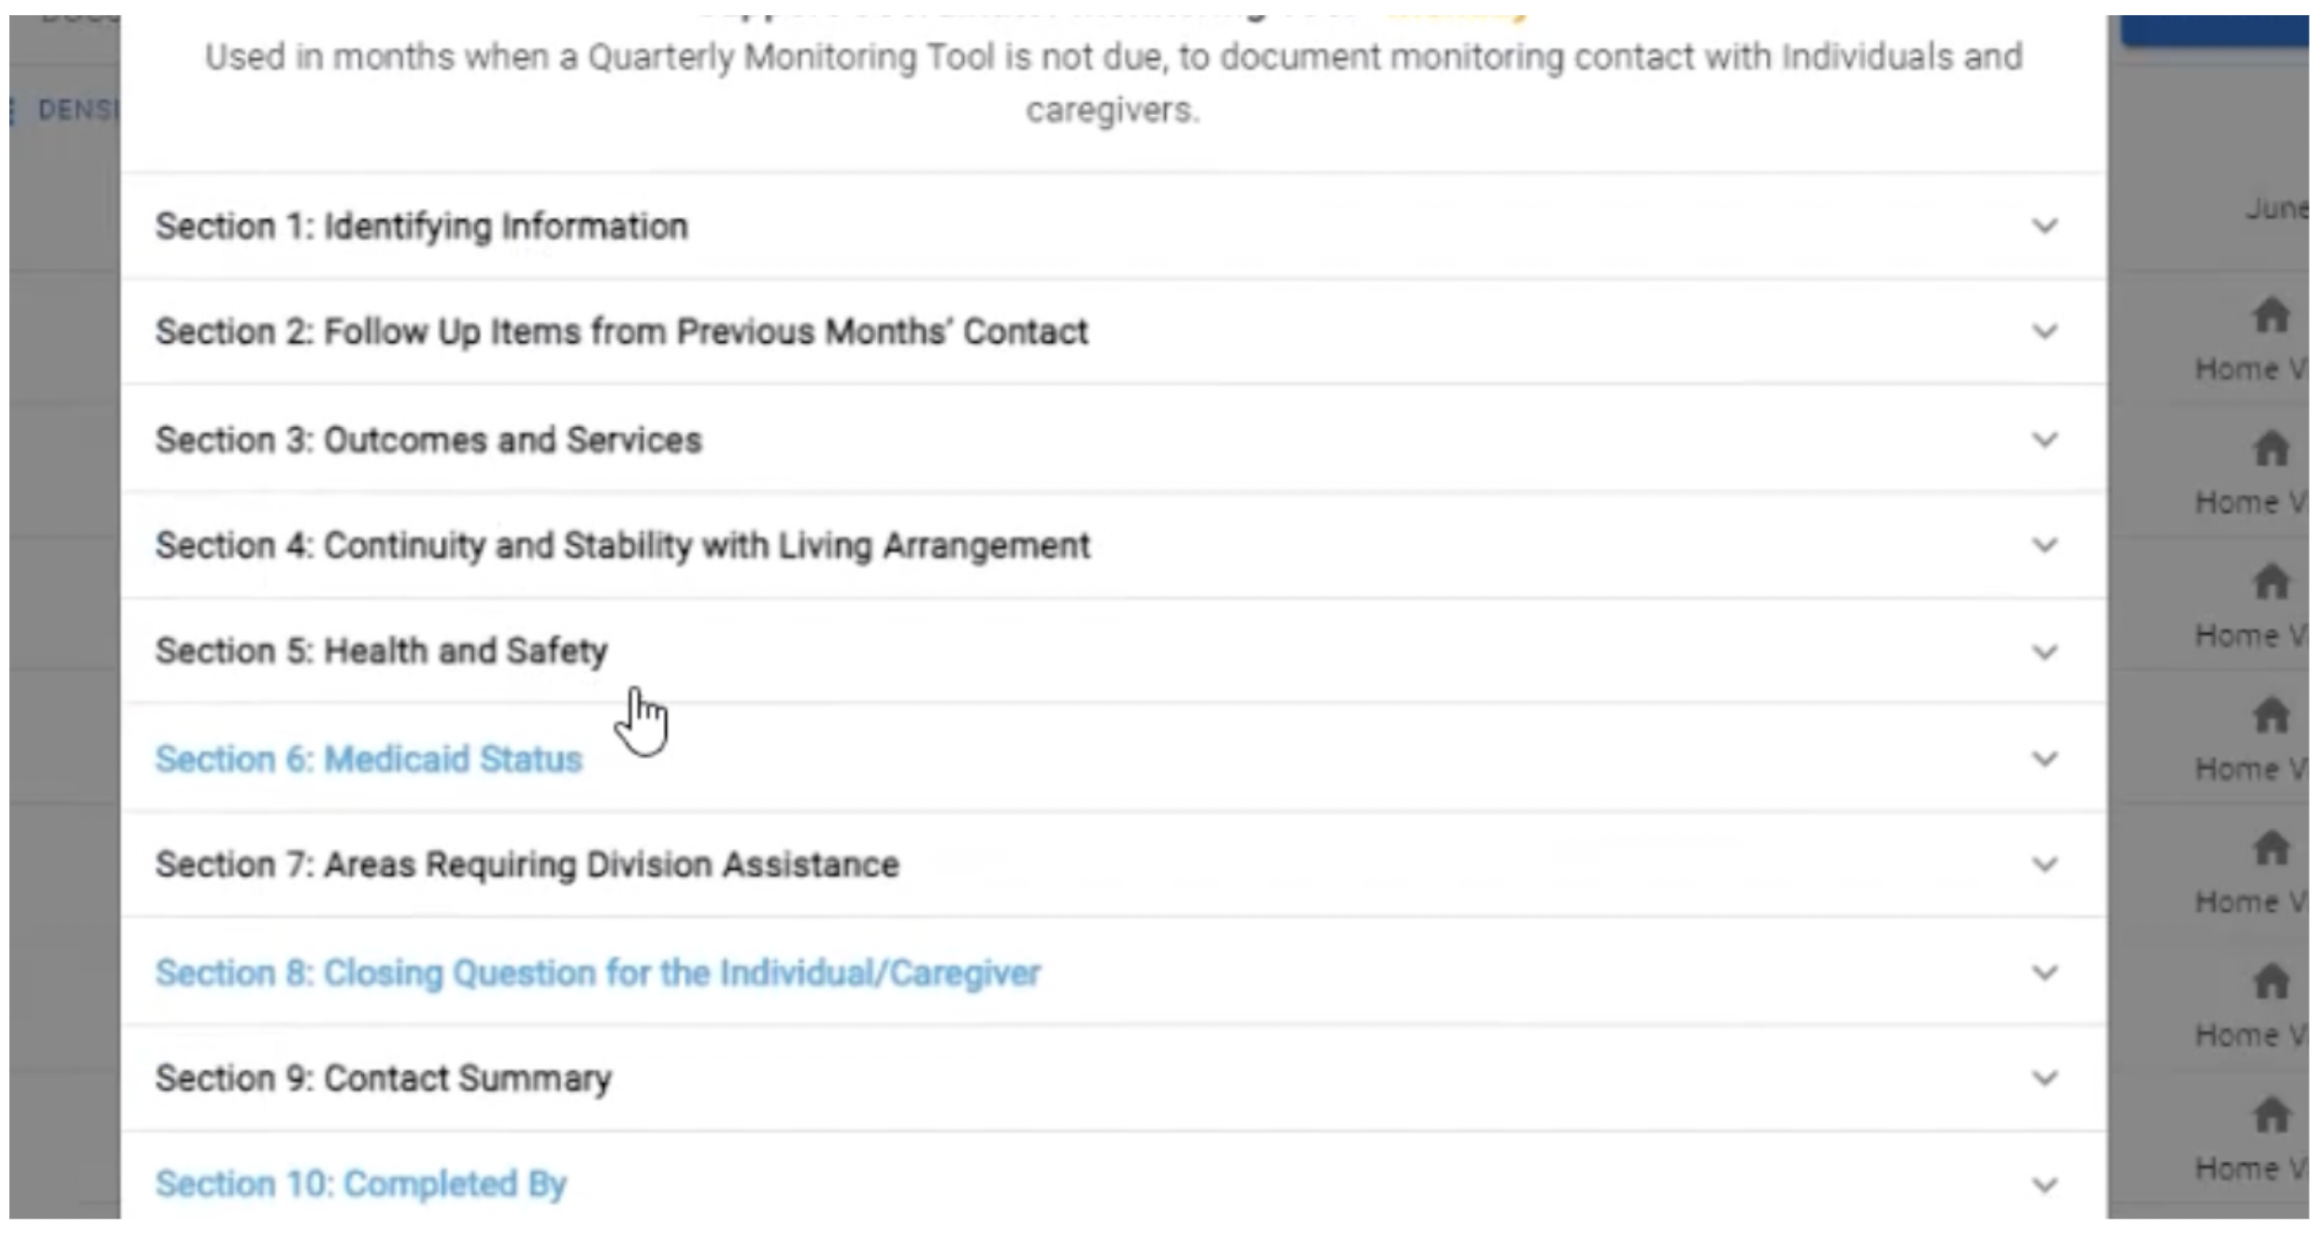
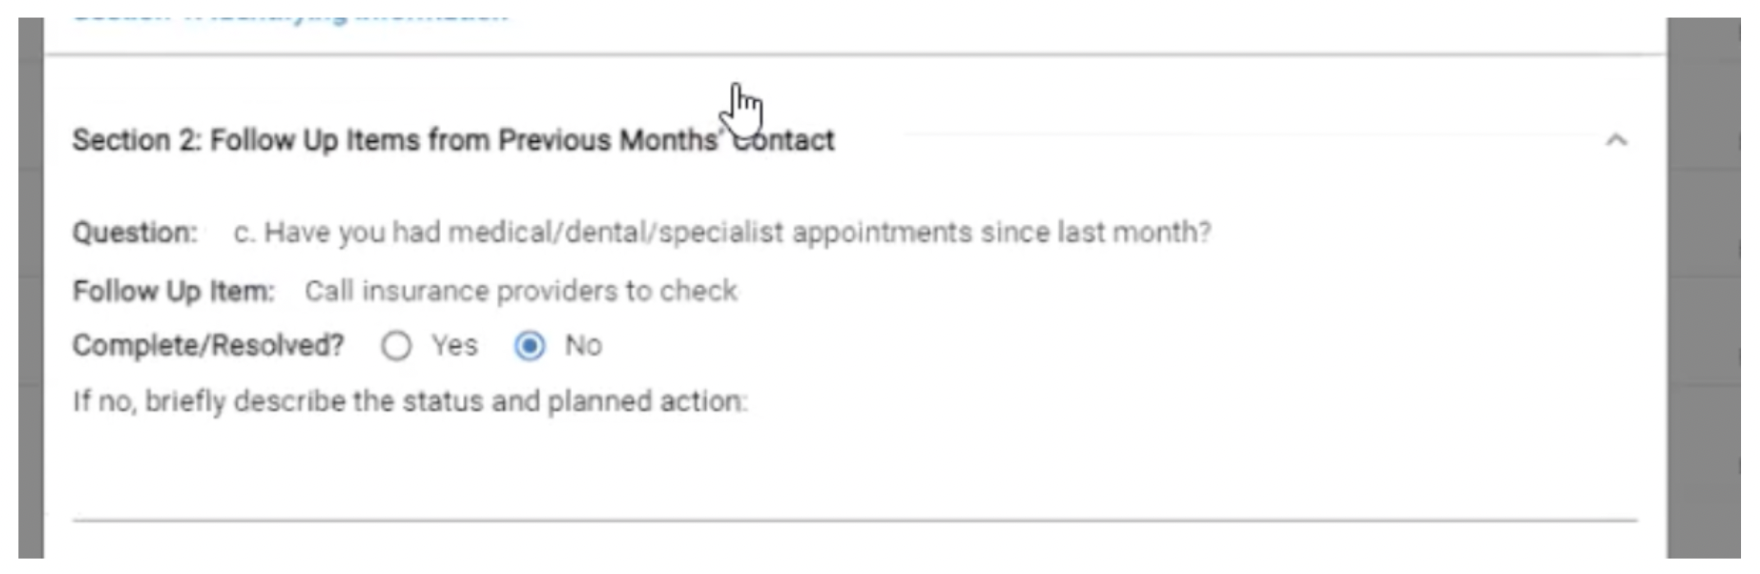
For section 2, any follow-up items from the previous month will be carried forwards. Until these have been resolved, they will continue to be brought into the MT. You can either choose to mark these as resolved, or if you select “No”, they’ll be brought forwards into the next month’s MT.
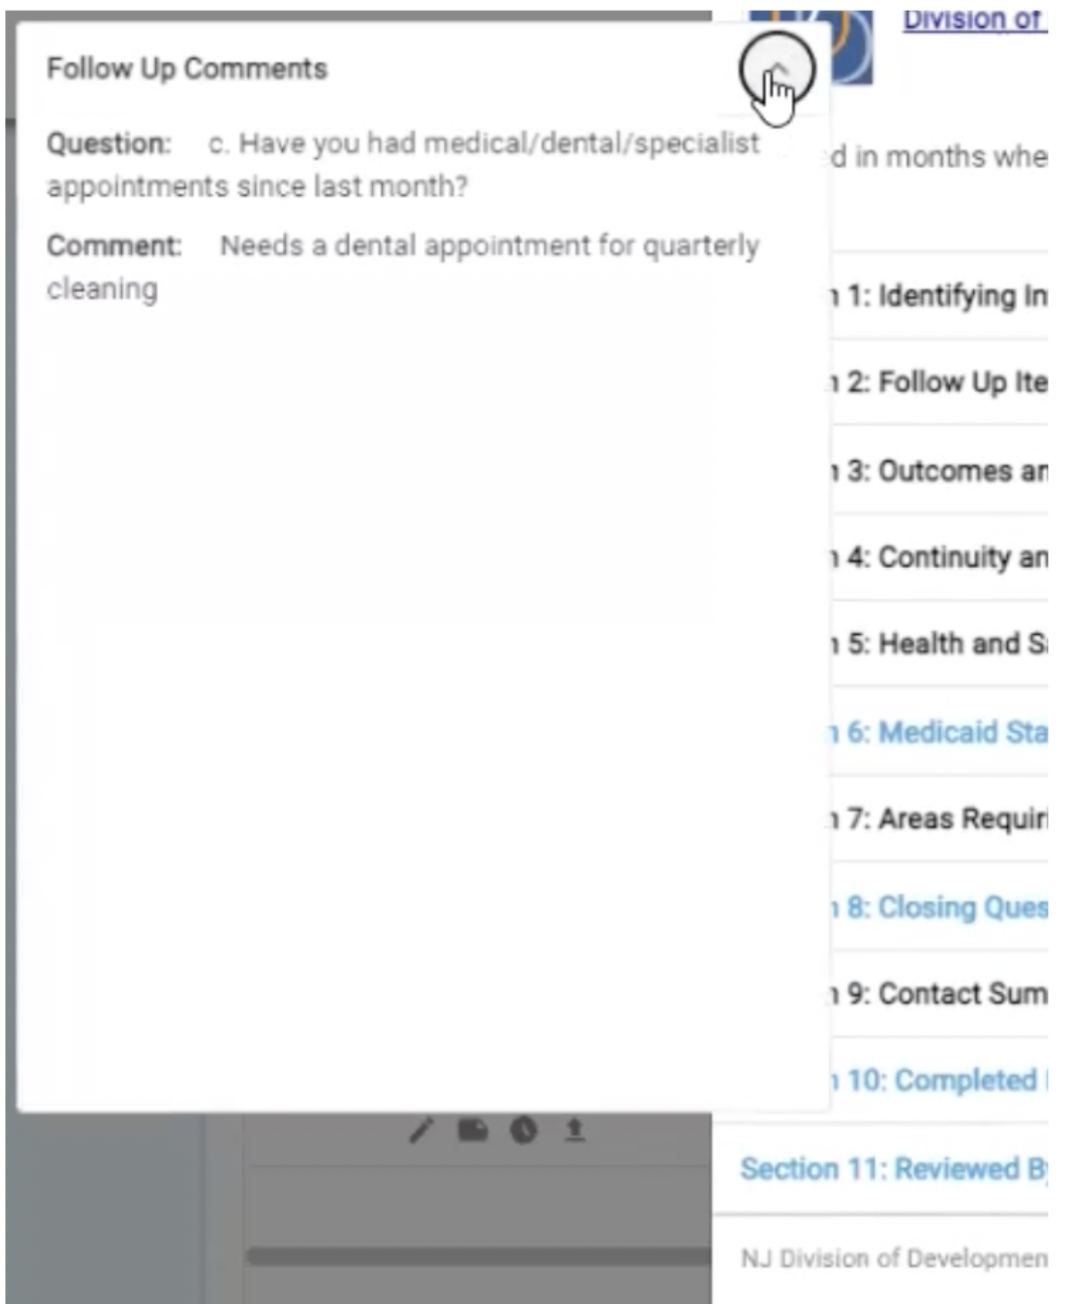
As you see in Section 3, any questions marked with an asterisk will require additional comments or follow up items.
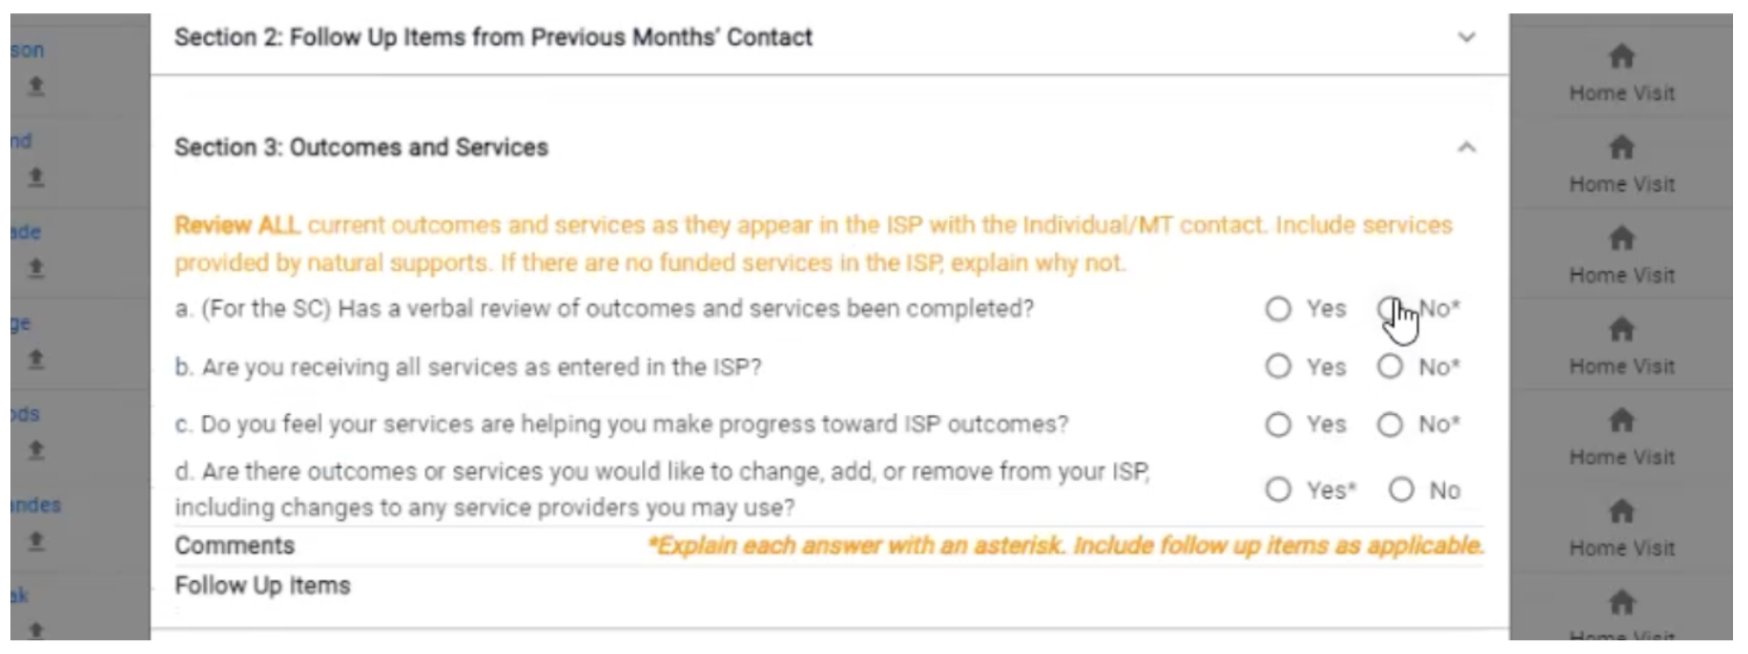
If you select an answer with an asterisk, you’ll see a pop-up where you can enter the additional context or follow-up items as needed.
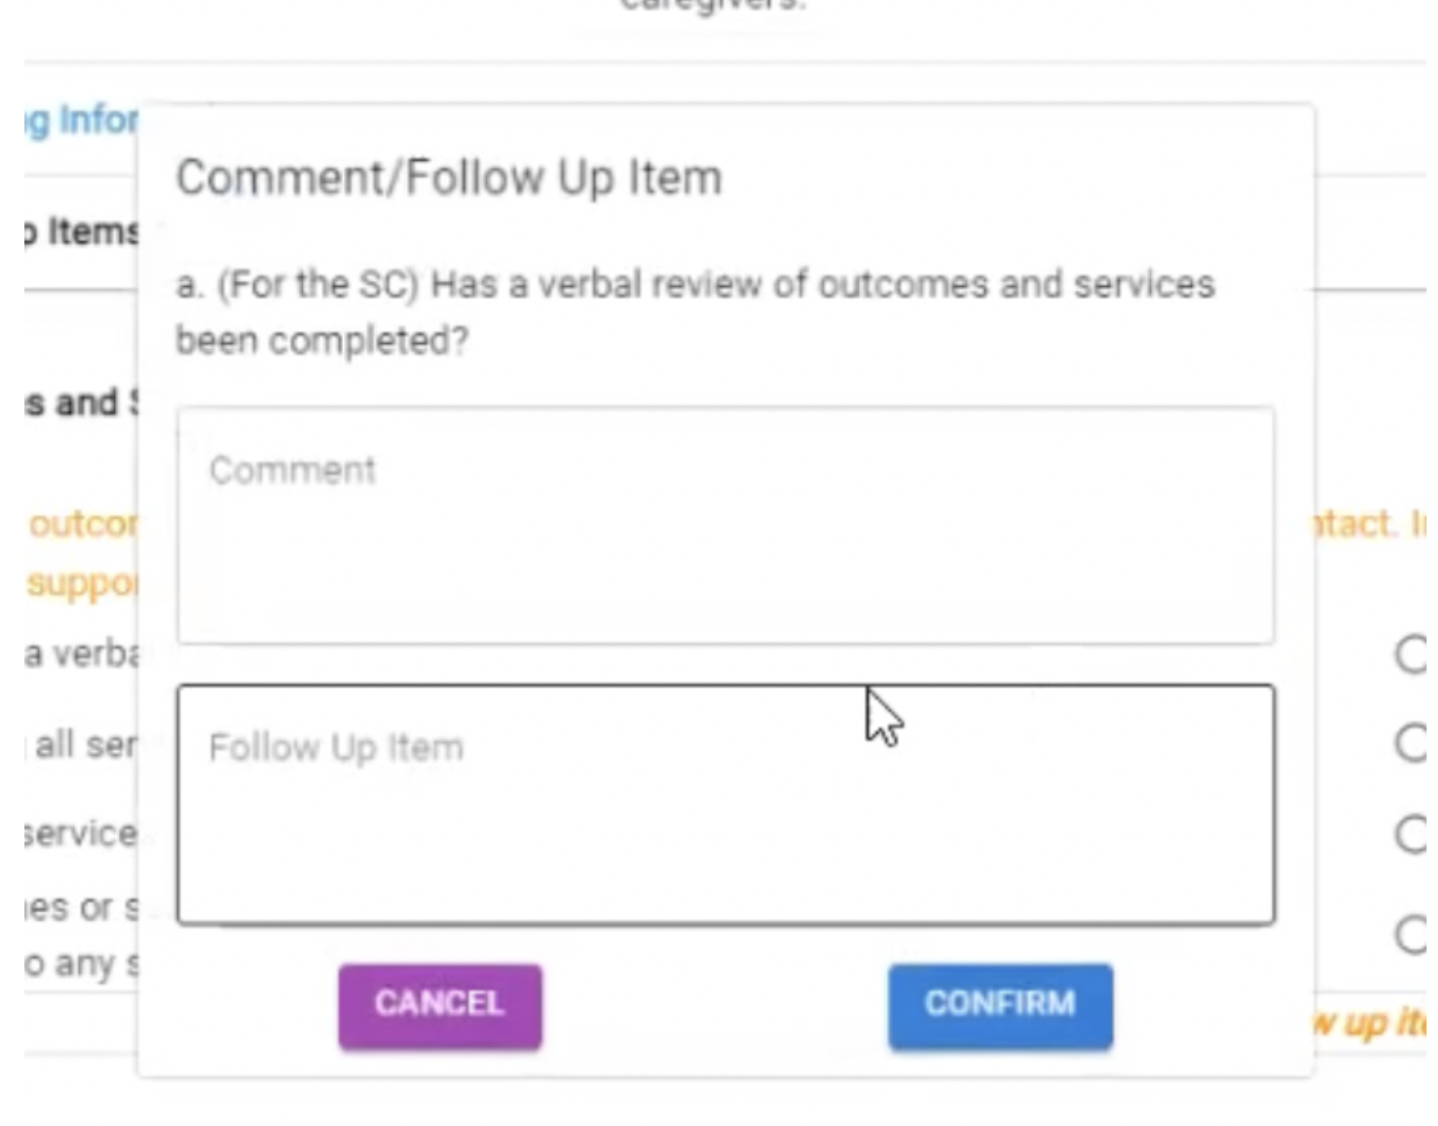
If you click “Cancel” here, your answer will be removed, as the additional information is required.
Continue filling out all the sections, and when it is complete, click on the Submit button.
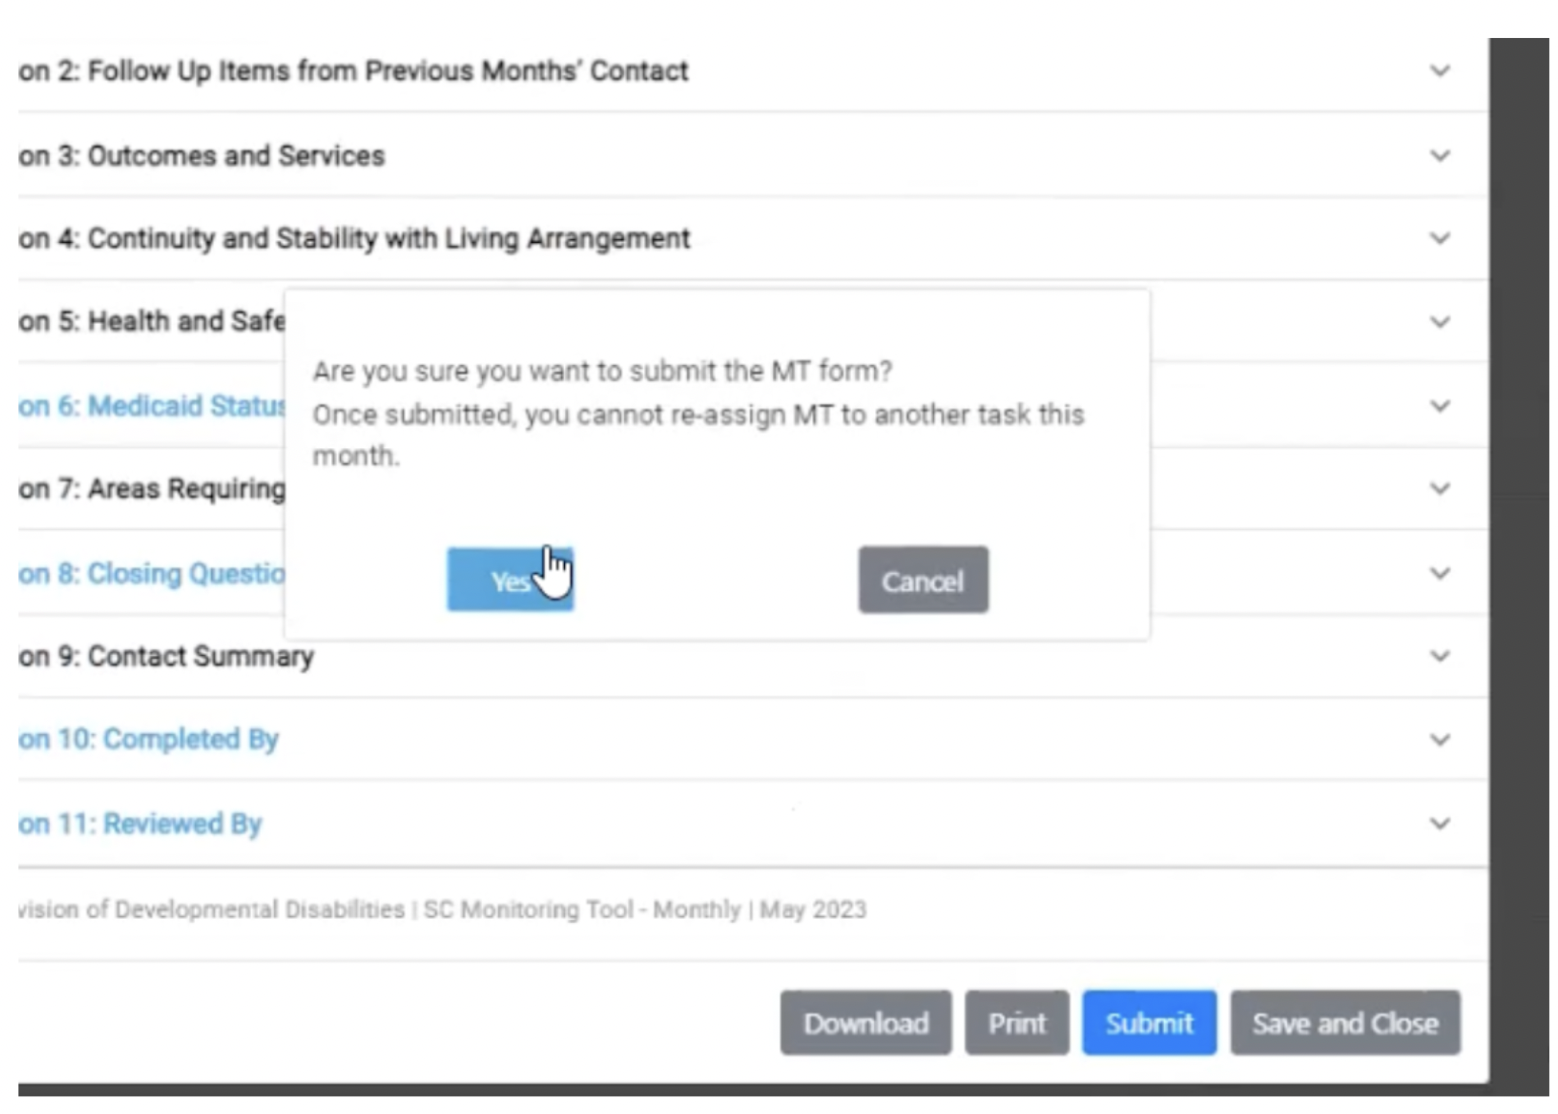
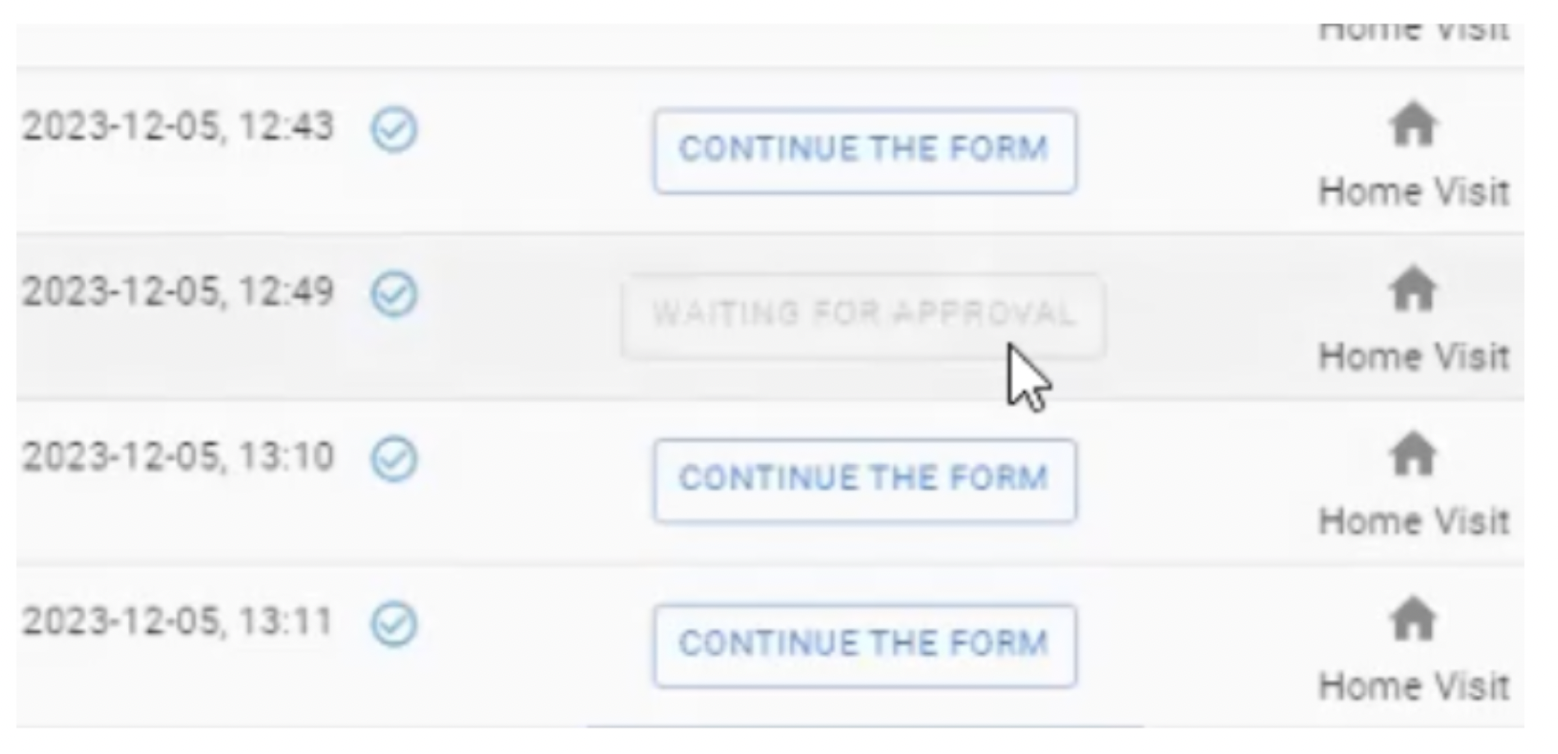
It will then be submitted for approval from the manager, and you’ll see the status as “Waiting for Approval”: